Install an Agent on SUSE RKE2
Torque agent can be installed on a SUSE Rancher Kubernetes Engine 2 (RKE2) cluster, including clusters running in your on-premise network. The agent is deployed to the cluster using the Kubernetes technology, the same way as on any other Kubernetes cluster. The main difference is that on an RKE2 node, kubectl and the kubeconfig file are not on their default paths, so you need to point your shell to them before deploying the agent.
Prerequisites
- A running RKE2 cluster. Please note that Torque does not support cluster nodes on ARM architecture.
- Outbound Ports for Kubernetes Cluster Nodes must be open to allow Torque to access and communicate with the cluster.
- Command-line access to the cluster, using one of the following:
- Directly on an RKE2 server node (recommended) - RKE2 ships its own
kubectlbinary under/var/lib/rancher/rke2/binand writes the admin kubeconfig to/etc/rancher/rke2/rke2.yaml. The kubeconfig file is readable byrootonly, so run the commands as root (for example,sudo -i). - From a remote machine with kubectl installed - copy
/etc/rancher/rke2/rke2.yamlfrom a server node to your machine, replace127.0.0.1in theserverfield with the IP address or hostname of the RKE2 server node, and set it as your kubeconfig. For details, see Cluster Access in the RKE2 documentation.
- Directly on an RKE2 server node (recommended) - RKE2 ships its own
- One or more target namespaces on the cluster where the Torque agent will create resources.
- Authentication and permissions - The agent will need sufficient permissions to create the environment's resources:
-
To create K8s resources (Pods, services, secrets... etc.) using K8s manifests or helm charts, create a service account with sufficient permissions to create the K8s resources. For Example:
Let's say that you would like to deploy your environments into a namespace called "my-ns". Use the below commands (change to your real namespace name) to create the appropriate service-account:
kubectl create serviceaccount my-ns-edit-sa --namespace=my-nskubectl create rolebinding my-sa-edit-rb --clusterrole=edit --serviceaccount=my-ns:my-ns-edit-sa --namespace=my-ns -
To create resources on your cloud using Terraform, there is no built-in authentication between RKE2 and Torque. Store your cloud credentials in the Torque secret store and use them in your Terraform deployment.
-
If your RKE2 cluster runs with the CIS hardening profile (profile: cis), Pod Security Admission is enforced cluster-wide. Make sure the namespaces used by the agent and by your environments allow the workloads Torque creates in them.
Setup
-
In Torque's Administration page, open the Cloud Accounts tab.
-
Click Connect a Cloud.
-
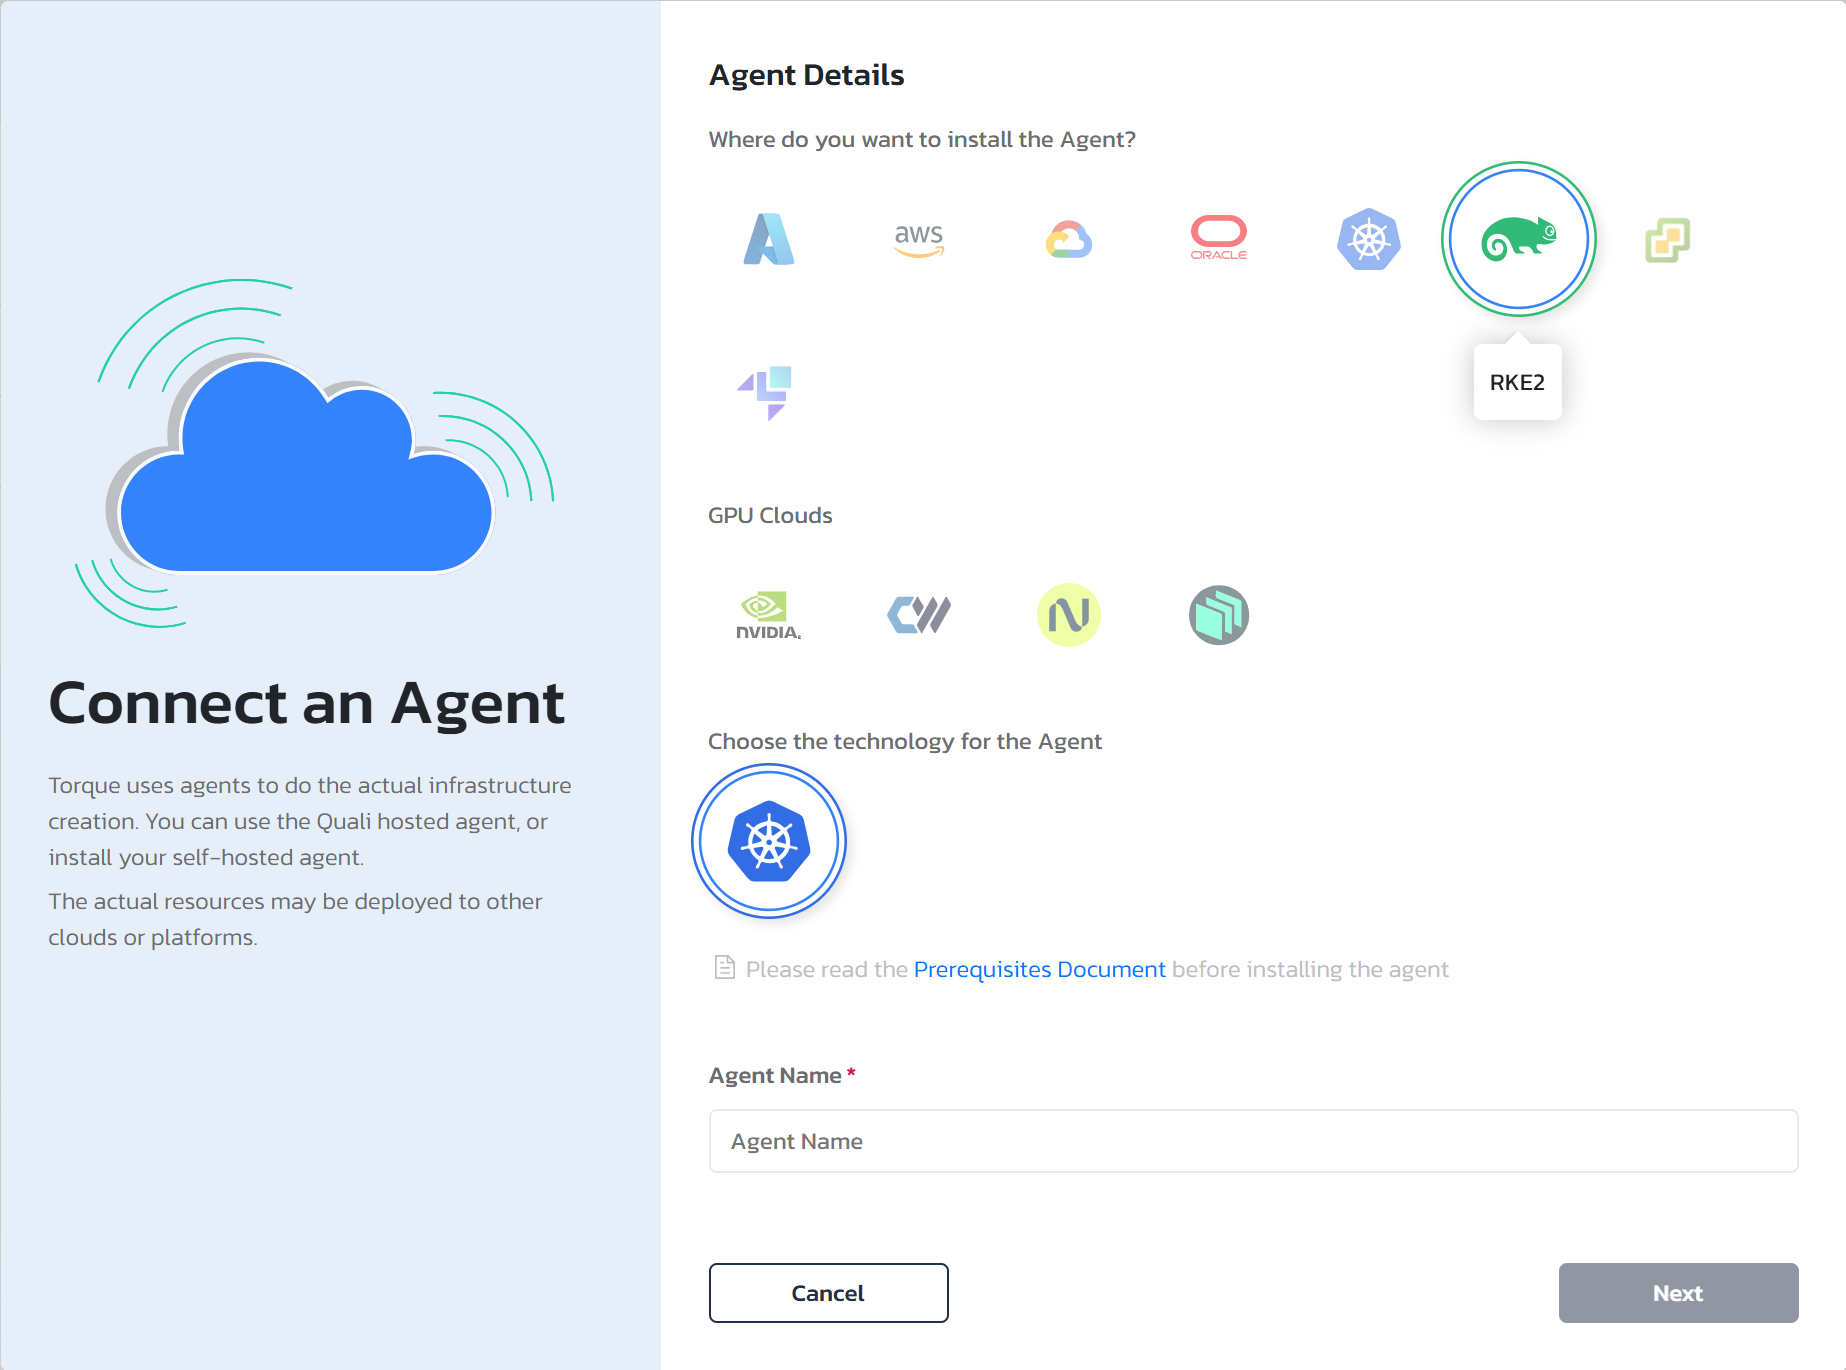
Under Where do you want to install the Agent?, select RKE2. The Kubernetes technology is selected for the agent automatically. Give the agent a name.
-
Click Next.
-
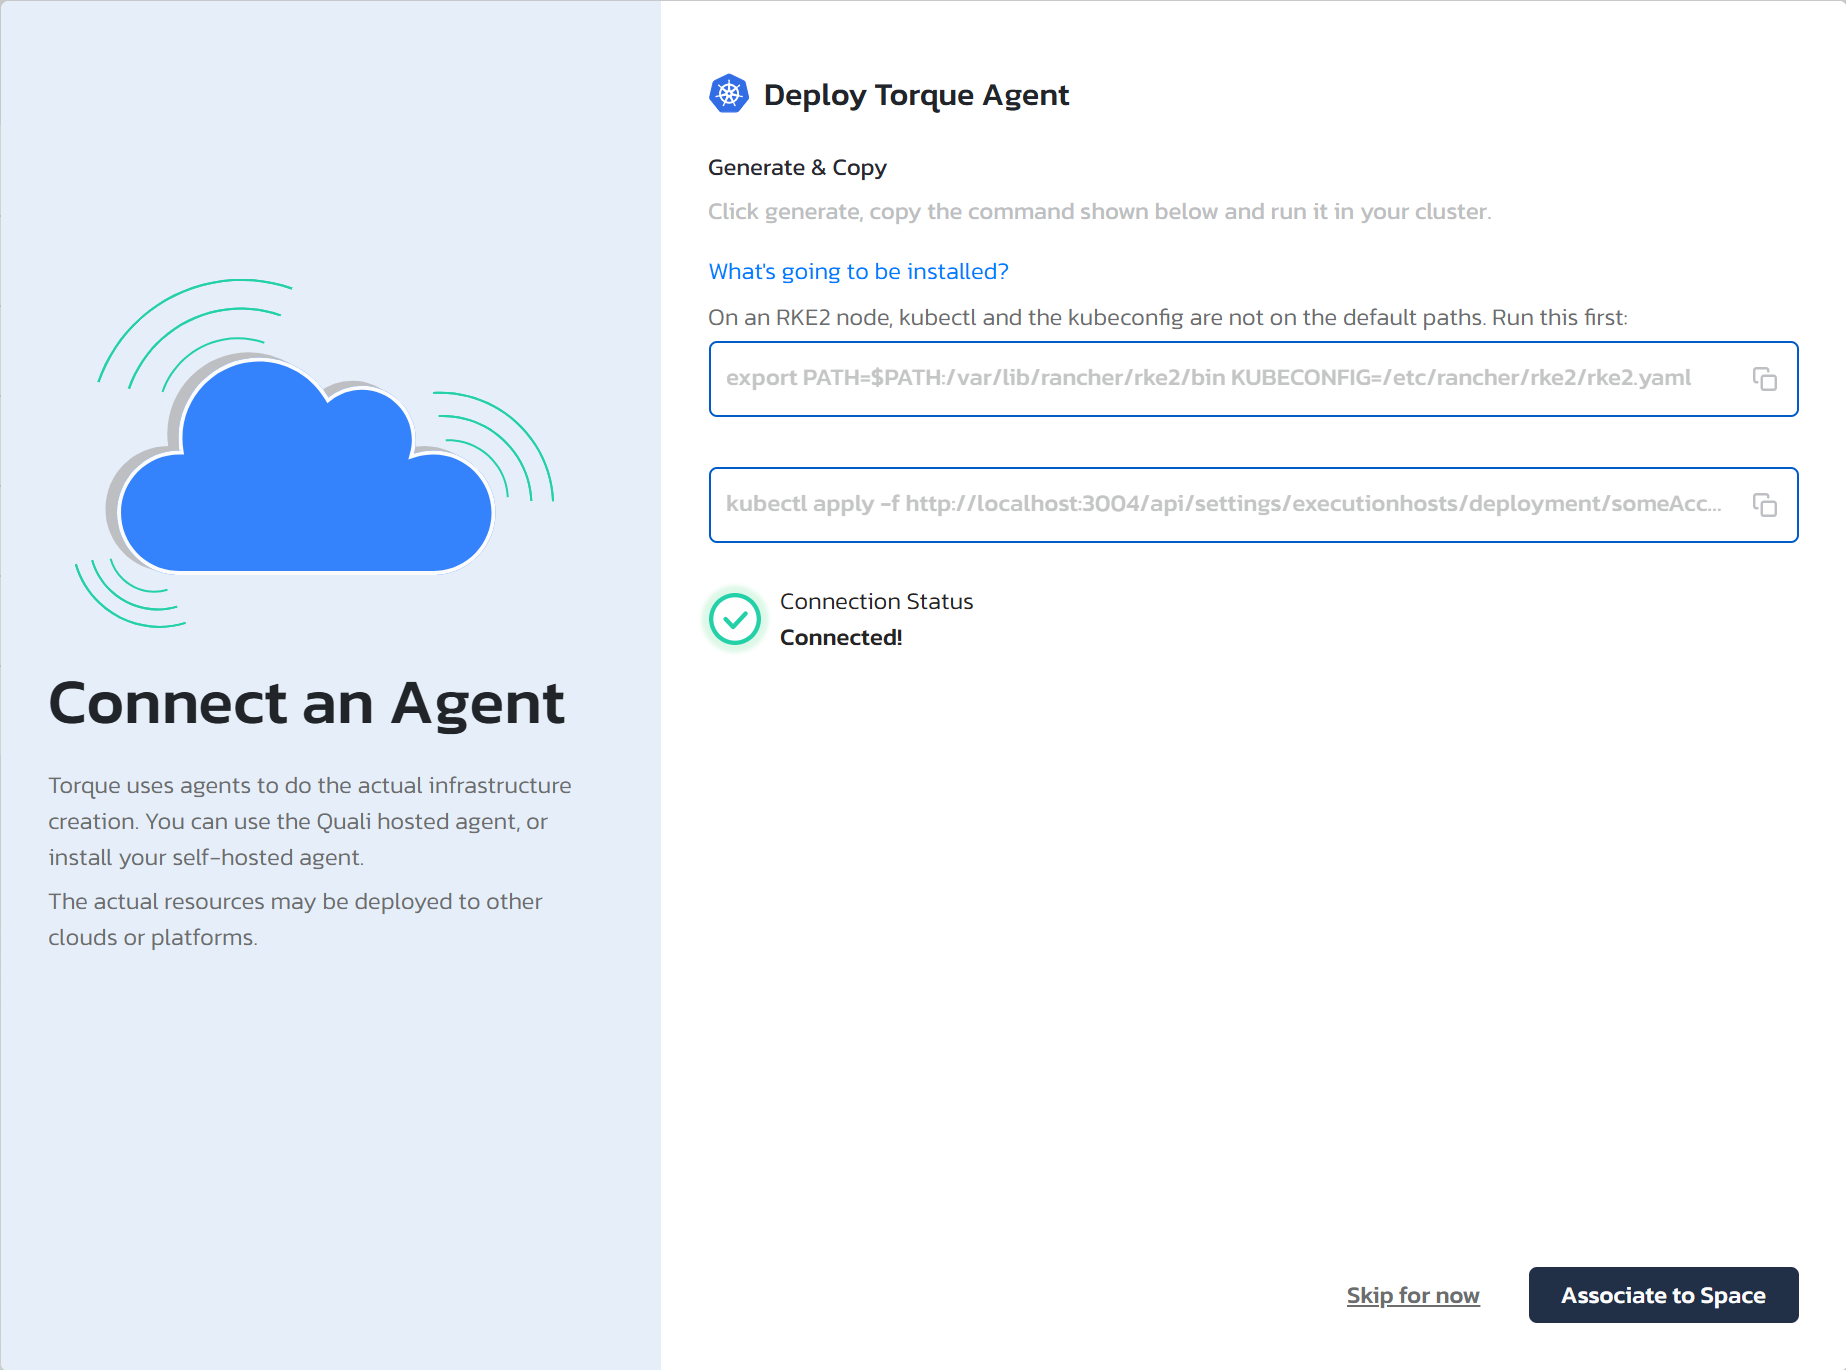
Click Generate. Torque displays two commands.
-
On the RKE2 node, copy and run the first command. It adds the RKE2
kubectlbinary to yourPATHand pointsKUBECONFIGto the RKE2 kubeconfig file:export PATH=$PATH:/var/lib/rancher/rke2/bin KUBECONFIG=/etc/rancher/rke2/rke2.yamlnoteSkip this step if you are working from a remote machine that already has
kubectlinstalled and a kubeconfig pointing to the RKE2 cluster. -
Copy the second command and run it in the same shell to deploy the agent to your cluster. For example:
kubectl apply -f https://portal.qtorque.io/api/settings/executionhosts/deployment/k***roi/deployment.yaml -
A Connected! status is displayed in Torque, indicating that the agent was successfully installed and can communicate with Torque.
-
Click Associate to Space to connect the host to a space, and provide the details you obtained in the prerequisites section.
Troubleshooting
If the agent fails to connect with Torque, you can try the following to identify the problem. Make sure you run the commands in a shell where the export command from the setup step was executed.
Replace the "agent-namespace" with your agent's namespace. You can find it in:
Administration --> Agents --> Identify your agent --> Click on the 3 dots menu --> Edit Agent --> Advanced K8s settings:
- If you get
kubectl: command not foundorThe connection to the server localhost:8080 was refused, the RKE2 paths are not set in your shell. Run theexportcommand again, and make sure you are running as root:export PATH=$PATH:/var/lib/rancher/rke2/bin KUBECONFIG=/etc/rancher/rke2/rke2.yaml - Make sure the agent pod is running and healthy. You can run the following command on your cluster:
kubectl get pods -n <agent-namespace> -l app=torque-agent - Make sure outbound http connection to Torque is open:
and also
kubectl exec -it $(kubectl get pods -n <agent-namespace> | grep torque-agent | awk '/'$2'/ {print $1;exit}') -n <agent-namespace> -- /bin/sh -c "curl -v http://portal.qtorque.io/hub/agent";kubectl exec -it $(kubectl get pods -n <agent-namespace> | grep torque-agent | awk '/'$2'/ {print $1;exit}') -n <agent-namespace> -- /bin/sh -c "nmap -p 5671 acrobatic-lime-gerbil.rmq3.cloudamqp.com";