Credentials
The Torque Credentials store is a built-in capability for Torque to securely store your Public Cloud authentication details in order for CloudFormation and Terraform type grains to securely access them. Credentials are similar in usage to Parameters, but unlike parameters which are single-value, credentials are specialized objects that contain multiple values with different structure depending on the credential type. Torque Credentials are supported for AWS (role based and access key based) and Azure (secret based) authentication.
To add a credential:
- Go to Administration > Credentials.
- Click Add Credentials.
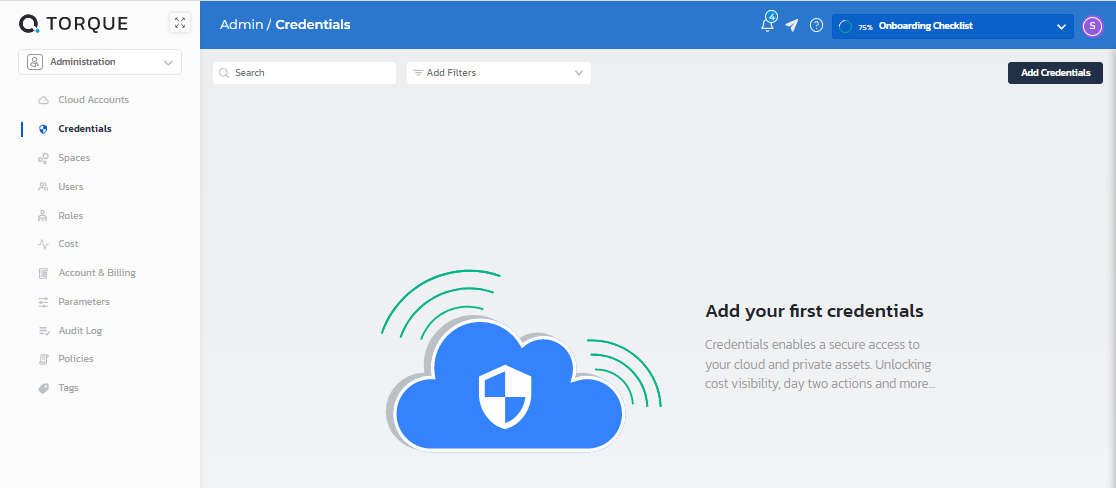
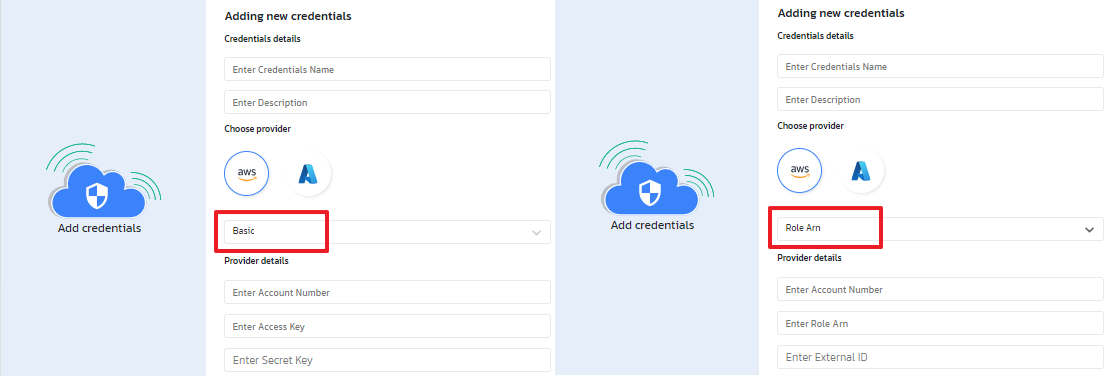
- Give the credential a name and optionally a description.
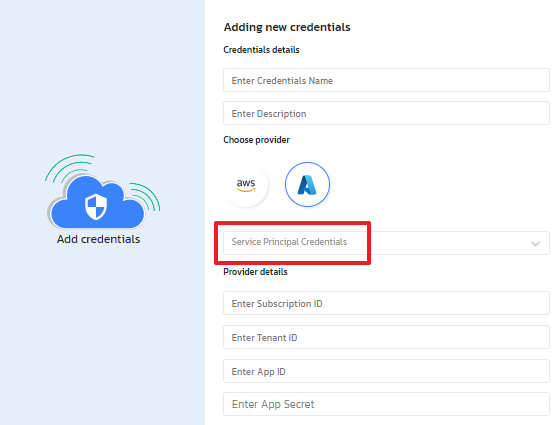
- Select the cloud provider (AWS / Azure).
- Select the credential type and enter the authentication details.
- For AWS, role assumption and access key credentials are supported. Make sure you have a Role Arn that allows Torque access. For details, see the Get Role ARN and external ID section below.
- For Azure, only Service Principle Client ID and Secret are supported.
- For AWS, role assumption and access key credentials are supported. Make sure you have a Role Arn that allows Torque access. For details, see the Get Role ARN and external ID section below.
- Click Apply.
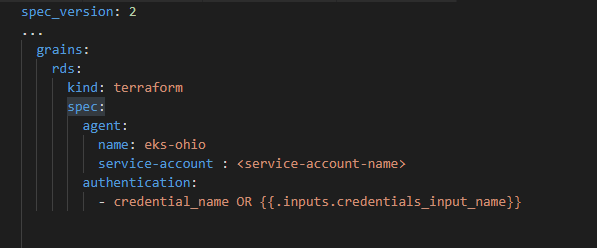
Once created, you can reference the credentials in the grain's authentication section.
Get Role ARN and external ID
-
In your AWS Management Console, open the IAM console at https://console.aws.amazon.com/iam/.
-
In the navigation pane of the IAM console, create a permissions policy to be associated with the role.
- Select Policies, and then click Create Policy. For information and assistance on generating an AWS IAM Policy, you can use the official AWS Policy Generator.
- Assign the permissions as appropriate.
- Choose a name for your policy and save it.
-
In the navigation pane of the IAM console, select Roles, and then click Create Role.
- From Select trusted entity, choose AWS Account.
- Under An AWS account ID, select An AWS account and enter 349148204654. (This is the Torque AWS account from which we will query the cost).
- Select Require external ID.
- Enter an External ID of your choosing. The External Id will be used to validate the Consumer of the ARN Role. Keep note of the external ID as you will need it later in the configuration step.
- In Next:Permissions, select the policy you have just created in step 1 for cost exploration permission.
- Click Next.
- Enter a Role Name or role name suffix to help you identify the purpose of this role or use AWS defined Name.
- Click Create Role.
- (Optional) Enter a Description for the new role.
- Review the role and then click Create role. Keep note of the role ARN as you will need it later in the configuration step.