Configurations
Overview
The Configuration page consolidates key system settings and administrative configurations for account management. This page replaces two older settings pages, streamlining access to critical configuration options
1. White Labeling
Customize the Torque interface with your organization's branding by uploading a custom logo. This ensures a consistent and professional look throughout the platform.
This feature allows you to:
- Replace the default Torque logo across the system.
- Upload three logo types: Favicon, Wide Logo, and Square Logo.
How to upload your logo
- Navigate to Configuration > White Labeling.
- Upload all three recommended logo types:
- Favicon – Appears in the browser tab.
- Wide Logo – This logo will appear in the header section of your website or application
- Square Logo – This logo will appear in places where a square image is needed, such as social media profile pictures.
- Confirm that your logo uploads successfully.
🔒 White Labeling is optionally available for Enterprise plans only.
2. Announcements
Use the Announcements feature to display important messages across the platform with a banner at the top of every page.
This feature allows you to create and manage announcement banners to notify users about critical updates. You can:
- Set banners for specific spaces or apply them globally.
- Customize the message, and banner color.
- Enable Maintenance Mode to prevent environment launches in selected spaces.
How to set up an Announcement
- Navigate to Configuration > Announcements.
- Use the ‘Preview Mode’ toggle to see how your banner will eventually look like.
- Enter your message and customize the banner color.
- Choose specific spaces to display the announcement or apply it system-wide.
- Enable the Maintenance Mode if needed. This mode enables preventing selected spaces from launching new environments during your scheduled downtime.
- Save changes to instantly publish the announcement.
3. Audit Logs
Torque’s Audit Logs provide comprehensive tracking of key platform activities, helping you monitor user behavior, investigate security risks, and maintain compliance.
Options include:
- ElasticSearch: With built-in Elastic Stack integration, you can forward audit data for real-time analysis and reporting.
- Torque Audit: Forward logs to Torque, and retain for 18 months..
How to set up an Audit Log destination
📖 Learn more about Torque Audit
info 🔒 Audit log integration is available for Enterprise plans only and requires a specific licensing feature.
4. Copilot Settings
Enable Torque’s AI-powered assistant to provide recommendations and enhance workflow automation, within your account.
These settings include 2 features:
1. Torque Copilot – Easily navigate Torque with our AI chatbot, always accessible and leveraging the official documentation for swift exploration.
(This feature is based on a 3rd party tool called DocsBot)
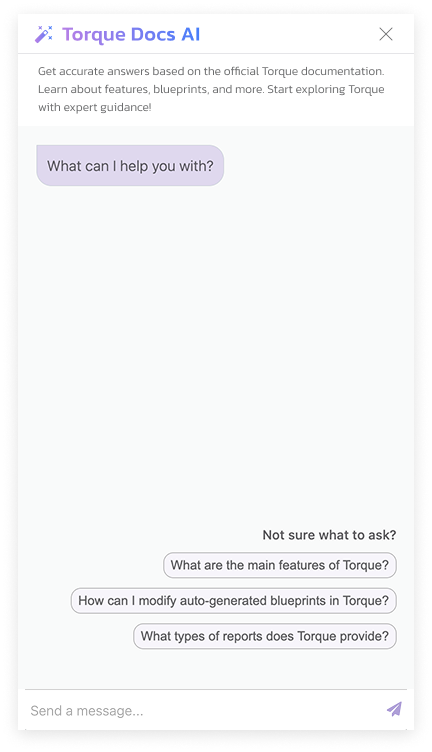
How to enable Torque Copilot
- Navigate to Configuration > Copilot Settings.
- Toggle on the ‘Torque Copilot’ toggle to show the AI chatbot button at the top header, next to the rest of the utilities.
- Toggle off to hide the AI chatbot and to prevent access from all users.
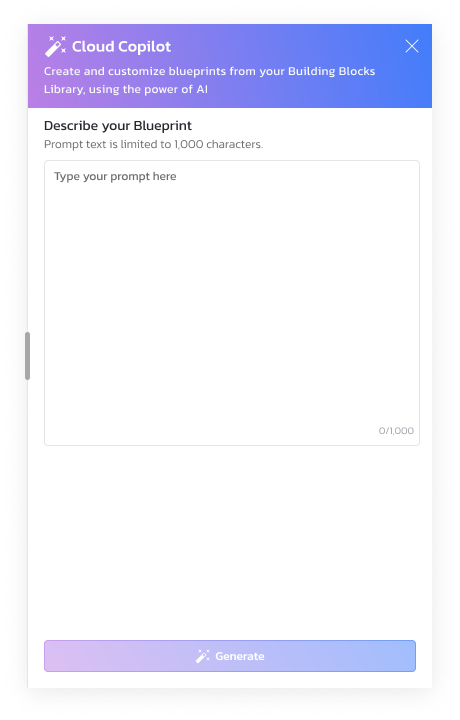
2. Cloud Copilot – Your internal AI assistance to create and customize Blueprints, auto-generate descriptions, and resolve live environment errors.
This AI assistant tool is subject to the Torque MSA and requires user consent.
With this feature you can:
-
Auto-generate descriptions for blueprints, to effortlessly expand the details on every blueprint in the account.
-
(Blueprint) Cloud Copilot - Create and customize blueprints from your Building Blocks Library, using simple language prompts and the power of AI.
-
AI Insights - Get AI assistant when you need it. Resolve issues in live environments, by clicking the “Get AI Insights” button, on every error log in your environment.

How to Enable Cloud Copilot
- Navigate to Configuration > Copilot Settings.
- Under the ‘Cloud Copilot’ section > click on the ‘AI Provider’ button to select where to host your AI Data while using Copilot:
- Host in **Torque’s Open AI
**There’s no further configuration, just click ‘Connect’ - Host in your own **Azure OpenAI service
**You’ll have to provide: API key, Endpoint URL, GPT-4o deployment name, and GPT-4o mini deployment name. - Host in your own **OpenAI
**You’ll have to provide only the API key.
- Host in **Torque’s Open AI
- To apply this settings, it requires a specific licensing feature - please contact us to enable Cloud Copilot for the account.
- Once your request was applied, and your selected provider was connected successfully, you’ll be able to enjoy the Cloud Copilot capabilities.
- You can toggle off to hide all the Cloud Copilot capabilities and prevent access from all users.
5. SSO Login
Streamline authentication with Single Sign-On (SSO) integration.
How to Enable SSO Login
- Navigate to Configuration > SSO Login.
- To enable SSO, click ‘Send a Request’ to connect with an account manager.
info 🔒 SSO Login is optionally available for Enterprise plans only.
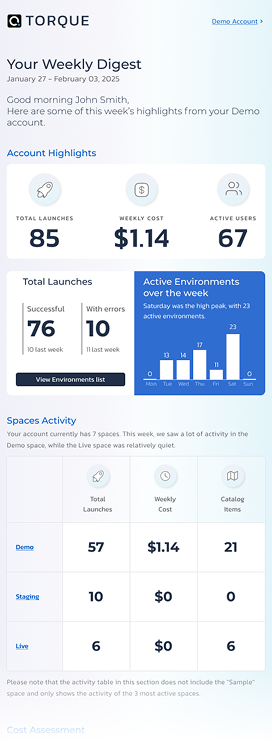
6. Email Reports
Subscribe to the ‘Weekly Digest’, a summary email providing key account activity insights.
Torque's weekly digest reports condense the most important information from a week's worth of data collected in Torque, making it easier for Torque administrators to quickly understand the most critical developments.
Torque ‘Weekly Digest’ emails are being sent to Torque administrators and will highlight:
- Cloud usage
- Torque users activity
- Environments usage
- Cloud Cost
- Top used IaC modules
- Top contributors to the operation
How to Enable Email Reports
- Navigate to Configuration > Email Reports.
- Toggle on the ‘Email Report’ toggle to subscribe to the ‘Weekly Digest’ email report
- Toggle off to unsubscribe
7. Approval Requests
Control the visibility of the Approval Requests page. Approval policies will still apply.
How to Enable Approval Requests
- Navigate to Configuration > Approval Requests.
- Toggle the setting to show or hide the Approval Requests page.
Notice that hiding the page does NOT prevent users from applying approval requests for launching, or extending environments.
8. Quick Launch
Enable your team to Quick Launch — this configuration skips the summary step and launches environments instantly.
When enabled by the account admin: -> The 'Review Summary' step is removed. -> You’ll see a single ‘Launch’ button for a quicker start.
How to Enable Quick Launch
- Navigate to Configuration > Quick Launch.
- Toggle the setting ON to show only the ‘Launch’ button, no ‘Review Summary’ option.
- Toggle the setting OFF to show only the ‘Review Summary’. Users will be able to launch only after reviewing the summary.
9. Experimental Features
Experimental Features give account administrators early access to upcoming capabilities in Torque that are still in development. These features are in a beta or testing phase and may not yet be fully supported or stable.
This settings gives Torque administrators early visibility and hands-on access to major upcoming features and UI changes—allowing them to explore, prepare, and influence what’s coming before it rolls out to all users.
What You Need to Know
- 🔬 Experimental features are optional and intended for evaluation and feedback purposes only.
- 🧪 These features may contain bugs or incomplete functionality. Use with caution in production environments.
- 👤 Only the admin who enables an experiment will see the changes. No other users in the account will be affected.
- 📆 Each experiment includes a defined trial period with a description of what’s new.
- 📩 Admins can provide feedback via: -> A survey form linked within the experiment. -> A support ticket submitted through the Torque support system.
How to Use Experimental Features
- Navigate to Configuration > Experimental Features.
- Review the list of available experiments.
- Click the toggle next to an experiment to enable or disable the feature for yourself only.
- Try out the new feature and explore the changes.
- Submit feedback via the linked survey or by opening a support ticket.
After the Experiment Period
Once the experiment ends:
- The feature will be evaluated based on admin feedback.
- If approved, it will be officially released and made available to all users in the account.
- You’ll receive updates in the product and via release notes.
🛠 Note: Enabling experimental features is a great way to influence Torque’s roadmap and help improve future releases.
info 🔒 Experimental Features are optionally available for Enterprise plans only.