CodeCommit Source Control
Torque supports connecting assets, blueprints and policies repositories on CodeCommit out of the box. To connect a repository, you need to grant Torque access to your repository of interest. Torque will access the repo (read only) both from the Torque SAAS application on AWS as well as from the runners on your cluster.
Prerequisites
-
Create a role for Torque to use which has permissions to connect to CodeCommit. To do that, follow the instructions:
- Sign in to the AWS Management Console and open the IAM console at https://console.aws.amazon.com/iam/.
- In the IAM console, in the navigation pane, choose "Roles", and then choose "Create Role".
- In Select trusted entities, choose "AWS account", and select "Another AWS account".
- In the account ID text box, type 349148204654. Check the Require external id checkbox and enter and ID of your choice.
- 📝 Take note of the external ID string.📝
- In Add permissions, search for AWSCodeCommitReadOnly and select it.
- Name your role and optionally create a description.
- Click on "Create Role" and complete the process.
- Search for your new role,
- 📝take note of its ARN.📝
-
Create an IAM user with the same policy:
- Sign in to the AWS Management Console and open the IAM console at https://console.aws.amazon.com/iam/.
- In the IAM console, in the navigation pane, choose Users, and then choose Create User.
- On the Permissions tab, choose Add Permissions.
- In Grant permissions, choose Attach existing policies directly.
- From the list of policies, select AWSCodeCommitReadOnly
- Choose Next: Review and complete the process.
-
Create Git Credentials:
- Follow the steps in AWS article, Step 3 only.
- 📝Take note of the the user name and password.📝
-
Initialize your CodeCommit Repository
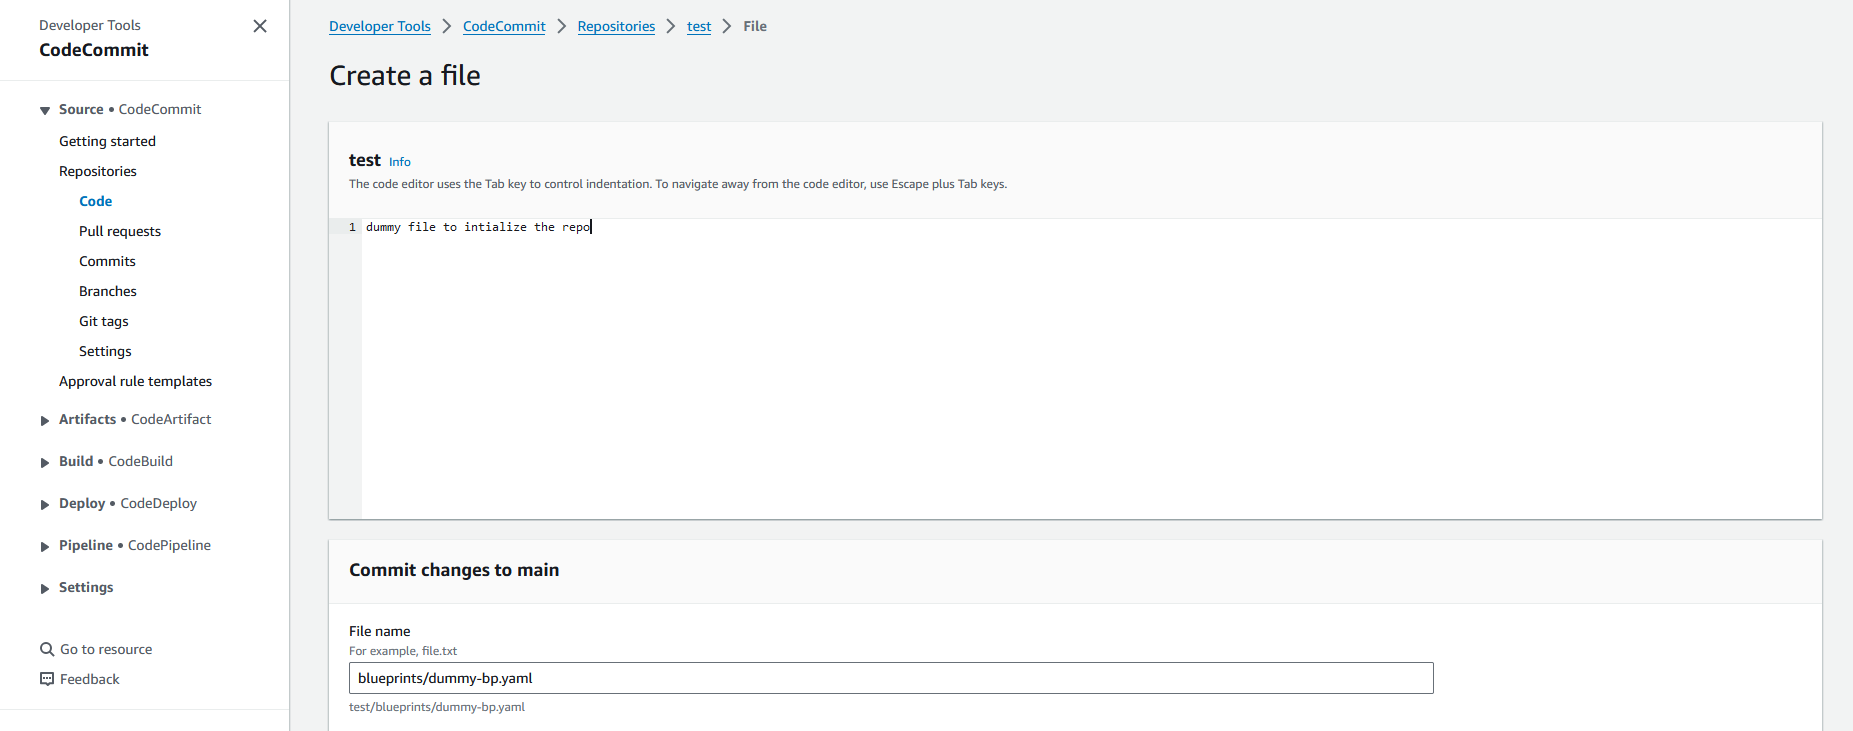
- CodeCommit does not have default files or a default branch until a file is committed, blocking Torque from adding this repo


- We recommend making a "blueprints" folder at the root of the repo with a single dummy yaml file. Please note the file extensions in the image below.

- Now we will verify the file is there and that the main branch has created.


- Finally we can now onboard the repo into Torque!
Connecting a CodeCommit Repository to Torque
In your space, navigate to "Repositories" and click on "Add Repositories". Choose the CodeCommit icon and fill in the requested details from the pre-requisites. For region, use the region where the CodeCommit hosting this repo is.