GitLab Source Control
Torque supports connecting asset/blueprint repositories on GitLab out of the box. To connect a repository, you must have access to the repository and grant Torque permission to the repository's organization, as explained below. For details about connecting a repository, see Discover Your Assets. You should be able to sign in with an account on any one of these online services and immediately get going with connecting asset repositories and launching environments.
This article refers to the SAAS version of GitLab. If you're using self hosted GitLab, check here.
Ensure the Torque application was added to the GitLab organization you're connecting
- Go to https://gitlab.com/-/profile/applications.
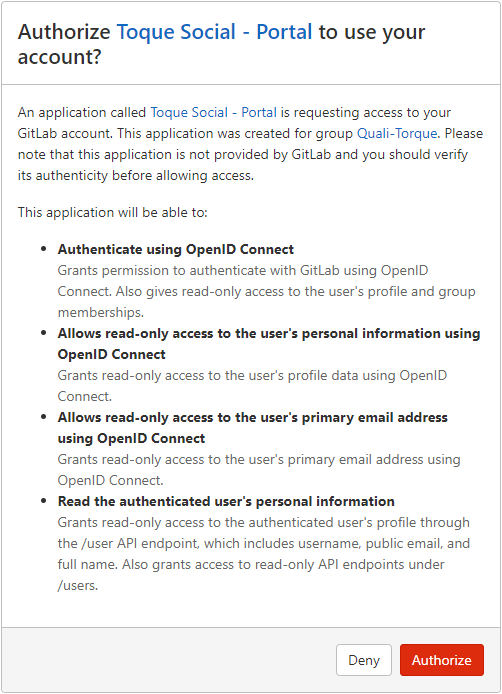
- Scroll down to the Authorized application section and make sure Qtorque.io-Social has the openid profile email read_user scope.
Ensure your organization has granted access to Torque
When connecting a repository, Torque installs an OAuth app called Qtorque on the organization. This app provides Torque with the necessary permissions to the organization's repositories. If Torque doesn't have access, you will be prompted to grant the proper authorizations when connecting the asset repository. The approved applications are listed in the GitLab Applications page.
- In Torque, go to the space's Settings > Repositories area and connect the repository.
- Authorize the organization.
- Go to GitLab Applications and make sure the Torque application has been authorized.

At this point, the Torque app is installed in the organization with the necessary permissions.
- If you're not an administrator in the organization, ask the administrator to grant access to the app in the GitLab Applications page.
- If you already authorized the Qtorque app without also granting access to a group with repositories you want to connect, make sure your GitLab user is added to that group (Guest role is enough).
- Return to Torque and continue setting up the connection.